
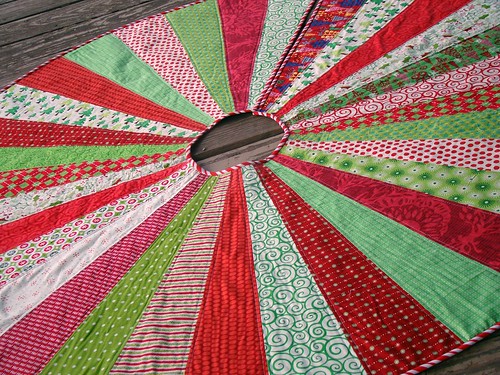
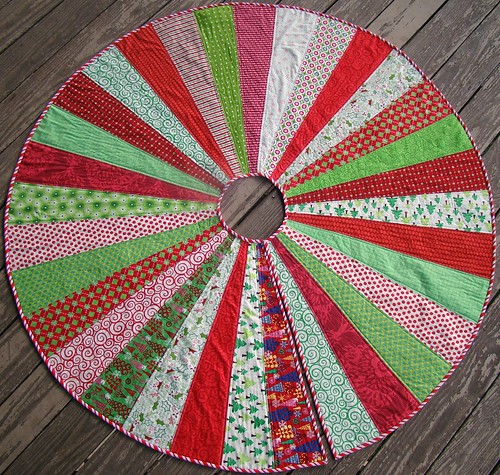
My monstrously large behemoth Christmas tree skirt is finished! I have been wanting to make a larger Christmas tree skirt since last Christmas, and of course waited until December to tackle that project. I have a few tree skirts including this one, which I absolutely love, however find it to be just too small for our large live tree we get every year.
This skirt measures 60 inches in diameter, and took a little quilty math and geometry to figure out the logistics, but in the end I must have retained something from 9th geometry with Mr. Rizzardi because it came together easy as pie. With a little help from Google on how exactly to use a protractor (seriously never thought I would need those 9th grade skills again...) I had the dimensions for my large and in charge tree skirt.
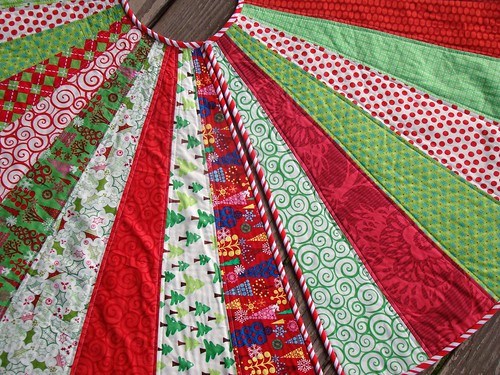
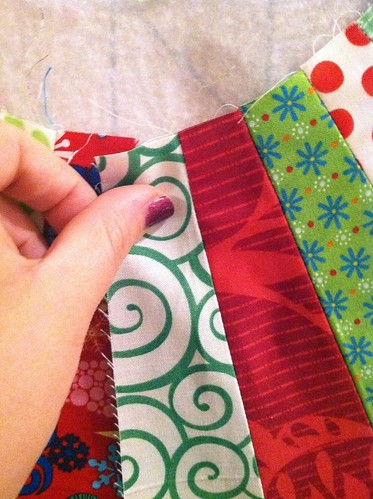
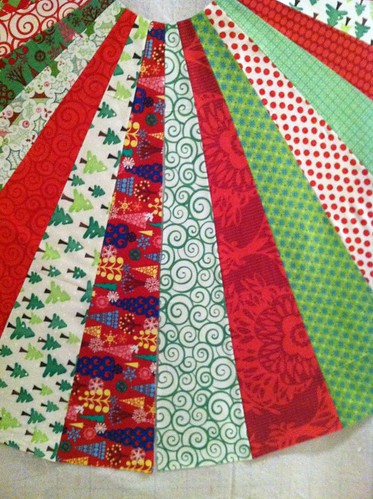
I used a plethora of various holiday prints from my stash as well as some non-holiday red and green favorites. I didn't get a chance to snap a picture of it nestled quite nicely under our tree, but I am so so pleased with how this turned out, and I'm sure will be used for many years to come.
Quilt Stats:
Quilt Name: Festive Christmas Tree Skirt
Size: 60" round (diameter of 60")
Fabrics: Assorted holiday and red and green prints
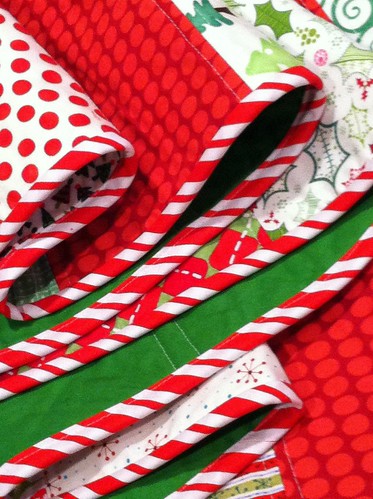
Binding: Bias cut red and white stripey fabric found at Joann's
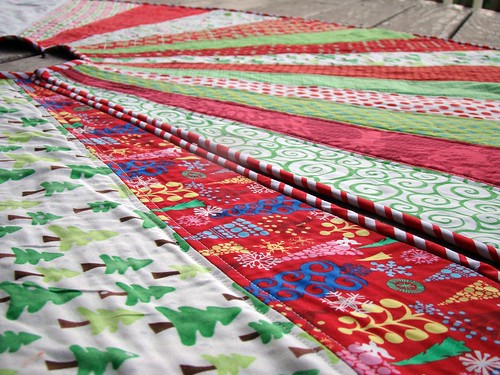
Quilting: Straight line quilting 1/4 inch on either side of each seam done by me
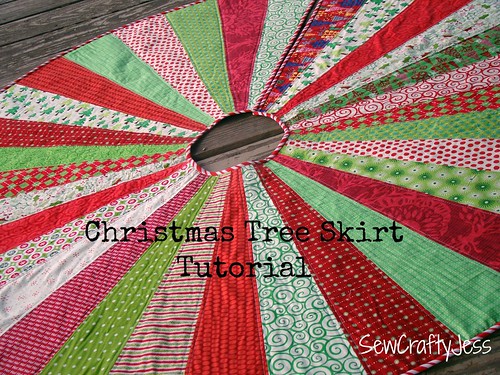
In case you'd like to make your very own tree skirt here is a tutorial for how I made mine:
Fabric Requirements
6 yards total of assorted prints
·
(32) 6.5" x 26.25" or (32) 6" x
23.75" strips of festive fabric (choose one set measurements for all 32
strips of fabric)
approximately 1 yard fabric for binding
3 yards fabric for backing
1. Measure and cut (32)
strips of fabric using either 6.5” x
26.25” or 6” x 23.75” for all (32)
strips. Using the first set of
measurements will yield a completed skirt measuring approximately 60" in
diameter. Using the second set of
measurements will yield a skirt slightly smaller than 60” in diameter.
- As shown below, if you choose to use the first set of measurements, creative cutting will be necessary when cutting the angles for the wedges, as the cutting line will be longer than a standard 24” quilting ruler.
o
Tip: Like
shown below, align a second quilting ruler to reach the full cutting distance OR use the 6” x 23.75” measurements
listed above, which will allow you to make all cuts using a standard 6” x 24”
quilting ruler.

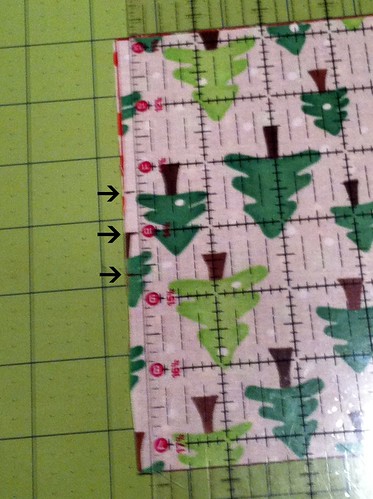
2. Once fabric strips
are cut, make one small mark to indicate the center of one short edge (6.5” or
6” edge): at 3.25" from the edge if you are using the larger measurements
or at 3" from the edge if you are using the smaller measurements. Make (2) more marks, 5/8" on either side
of your middle mark, as shown below.
- Tip: cut several strips at one time by layering multiple strips on top of one another to save time marking and cutting.
3. Now align your ruler from the far left mark you just made to the opposite left corner and cut your fabric. Repeat for the right side.
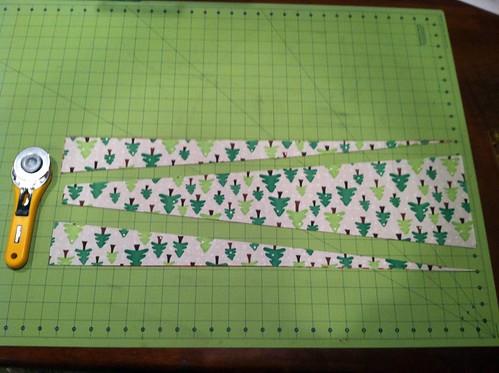
4. Once all (32) wedges are cut, sew all wedges together using a ¼” seam allowance. Leave one seam un-sewn.
5. Spread out the tree skirt top on a design wall or the floor. The seam that was left un-sewn should overlap by about 1/2" as shown below.
5. Spread out the tree skirt top on a design wall or the floor. The seam that was left un-sewn should overlap by about 1/2" as shown below.
6. Trim approximately
¼” off of each wedge at the un-sewn seam so that it lays flat and no longer
overlaps. Do not worry if more than ¼”
needs trimmed, simply trim so that the seam no longer overlaps.
7. Baste, quilt and bind using bias binding to finish the tree skirt and enjoy!
Please contact me at sewcraftyjess@gmail.com should you have any questions, happy holidays!
So cute!! And thanks for making it big enough for a live tree :) Our tree is huge every year so I've never made a skirt for it, I just wrap christmas fabric around it :) I'll have to make one for next year
ReplyDeleteAdorable! thank you for sharing :)
ReplyDeleteWhat a great tree skirt!!
ReplyDeleteIt looks fantastic. I love the binding fabric! One of these years I need to get my butt in gear and make one of these!
ReplyDeleteThis is so pretty! Thanks for doing the math for us ;-)
ReplyDeleteForget the tree, I want one to wear! That looks fantastic!
ReplyDeleteHee hee, I love that you googled how to use a protractor, I think that may get filed under 'things you thought you'd never search for' category :oD Still, it obviously worked well, it looks fab :o)
ReplyDeleteOh YAY! So glad to see that it all worked out. Looks awesome.
ReplyDeleteThis is wonderful! Good for you - love that it's BIG!
ReplyDeleteBeautiful, I love it!
ReplyDeleteReal trees definitely need a different kind of tree skirt, don't they?!
The one I made this year felt so big, with such a big hole in the middle, but still isn't quite big enough. Yours looks perfect!
WOW!!!! I caught my breath when I saw this, it's gorgeous!!!
ReplyDeleteJust beautiful! Do take a picture with the tree - I'd love to see it all together!
ReplyDeleteBeautiful! unfortunately my Charlie Brown tree does not require a skirt but I might use the tutorial next year :)
ReplyDeleteTurned out really pretty and Christmasy. ;o)
ReplyDeleteThanks for sharing the tutorial and your tree skirt picture.
OMG! Thanks for figuring this out! I am in the process of making a strippy tree skirt to match the stockings I just made for my daughter's new home!
ReplyDeleteHi there!. New follower from Pinterest. I wish I had a tree skirt like this!. I'd love it if you came by my place :) xx
ReplyDeleteLove this! I'm hoping to use this idea to make a 30-36 inch diameter skirt. Praying I can figure out the math! :)
ReplyDeleteThis is beautiful!! I've just be browsing through your fantastic blog and I want to be your fun in hopes that your quilting awesomeness will rub off on me! I would LOVE to have you come over and do a tutorial post on my blog!
ReplyDeleteWONDERFUL job! on this and all the others!
Your newest follower,
AllieMakes.Blogspot.com
Very helpful tutorial! Hope to make one in time for Christmas- thanks for giving us a realistic time to try this project! How do you finish the backside?
ReplyDeleteI just finished a tree skirt using this tutorial - thanks so much! I love how it turned out. (I have a photo if you want to see! http://sphotos-b.xx.fbcdn.net/hphotos-snc6/282377_10151076401182523_343572452_n.jpg)
ReplyDeleteThis is my very first Christmas as my own family unit, so I'm in need of some Christmas basics. Being a diy type of person, I would like to sew my own quilted tree skirt. Quilting is something I've just never gotten into, but I'd like to try. I'm a little nervous, though. I thought I'd get started early. All of the Christmas fabrics should be out as soon as the Halloween stuff gets cleared out. To make a long story short, your skirt is really pretty and looks like something I could accomplish. I really like it!! If I make it, I'll be sure to send you a picture!
ReplyDeletechristmas fabrics typically start arriving in quilt shops in july~ hence the phrase, "chrsitmas in july"!! i'm sure you'll have no trouble finding many, many irrisitable fabrics!! good luck with your endeavor!!
DeleteI made it! Great tutorial!
Deletehttp://kai-ta-hetera.blogspot.com/2012/12/quilted-christmas-tree-skirt.html
This is almost EXACTLY what I am looking for! Last year I thought how cool it would be to have a giant dresden plate tree skirt but I so didn't want to figure out the math! This is close enough that I'll totally go with it! Thanks SO much for doing the hard part AND for sharing it with us! Looks great!
ReplyDeleteI LOVE this! I'm totally not a quilter but you broke this down enough I want to give it a shot! Thank you for sharing!
ReplyDeleteI've collected used ties at garage sales for years always thought I'd make a quilt with them, that hasn't happen. A couple of weeks ago I started think of making a tree skirt with some, I think this will really help me adapt the ties to your pattern. I hope to be able to keep the points on when I cut and sew.
ReplyDeleteThis is a gorgeous tree skirt! I've been looking for one that I love enough to finally make. This is it. I'd love if you stopped by and linked it up to my weekly link party. :) http://thelifeofjenniferdawn.blogspot.com/2012/11/a-little-bird-told-me-link-party-19.html
ReplyDeleteI'm terrible with math. So how much of each fabric will we need if we are cutting from bolts at the fabric store? 1/4 of each fabric? More? Less? Please let me know! I want to make this so badly and would also love to make these for presents next year!
ReplyDelete...1/4 yard would yield 2 usable pieces of fabric if you were to make a slightly smaller skirt; the lenght of your pieces would only be able to be 21"-22" max. typically the width of fabric, including selveges which are unusable, is said to be 44"-45". in reality the yield is 42"-43" once you loose the selveges. half of 42 or 43 is 21 or 21.5 respectively. jessica used 32 wedge pieces to make her skirt. so, depending on the size you'd want to make you'd need either 32, 1/4 yard cuts for the 60" or larger size, or 16, 1/4 yd cuts for smaller size. doing some quick simple math (short of sitting down with protractor, pen a paper) i'd guess your smaller size would measure somewhere around 44"-50", maybe a few inches larger.
DeleteNevermind, I just figured it out, I think. For anyone else who needs to know, I did the measurements based on the 32 6" x 23.75" fabric strips and based on 8 different kinds of fabrics (making 4 strips of each fabric, totaling 32). This makes 24" x 95" for each fabric, so I would buy about 3 yards of each fabric (but you will no doubt have leftovers - to me that's a good thing!). Hope this helps!
ReplyDeleteThanks Chelsea! I went to email you back, and you are a no-reply blogger, so I didn't have your email! Yes you will need a little less than a 1/4" yard x WOF for each strip (with plenty of left over).
Deletewow! that's a TON of fabric chelsea!!
Deleteif the yield is 4 strips from each fabric... and you need 32 cut pieces for skirt.
32 pieces/4 pieces from each fabric = 8 fabrics needed.
8 fabrics needed x 3 yards of each fabric = 24 yards of fabric.
24 yards of fabric x $10-$11/yard = $240-$264. YIKES....
did i compute that correctly???
i haven't gone as far as to calculate how much of each fabric you'd actually use, versus have leftover, but....maybe you'd have soooo much left that you could make several skirts from your 24 yards of fabric. which would make the up front cost not so steep!??!!
I think your math is a bit off. If you are using 4 pieces of 8 fabrics, you'll need 24" (or 2/3 of a yard) of each fabric. That's about 2 2/3 yards. I'd buy 3 just I case.
DeleteDeb- No you wouldn't need nearly that much fabric. The WOF is not wide enought (44") to get 2 wedges per 6.5" x WOF strip. Assuming you are only cutting one wedge per 6.5" x WOF strip, you would need 8 yards of total fabric (32 1/4" yd cuts from the bolt=8 yards). This would mean 8 different 1 yard cuts of fabric would yield 4 wedges per fabric, for a total of 32 wedges. Of course this will leave you with a leftover piece of each fabric measuring appx 17" x 36", so you will have plenty of fabric to make your tree skirt backing, and binding (and then some!)
DeleteHope this clears up any confusion
Greatest find this year so far.. great job and its lovely. I need one done too and I procrastinated also.. I bet I do better next year.. Hey, anymore great ideas you have I could get ahead on..LOL
ReplyDeleteBeautiful tree skirt and excellent tutorial!
ReplyDeleteVery nice and could be a good way to use up some fabric. I began keeping my tree up all year this past year (finally fulfilled a wish) and just change themes as desired. My family and friends love it. Soo, I could use this pattern for many types of fabric/themes. Thanks
ReplyDeleteLike the tie idea..how cool for a Father's Day tree!!
Could this be done using the 9 degree wedge?
ReplyDeleteHi Pat! hopefully you check back, you are a no-reply blogger! I'm not sure what the 9 degree wedge is...so to be honest I'm not sure! I'm absolutely positive there are a million ways to figure out how to make something like this, this is just the way I came up with that was easiest for me!
DeleteThis is just what I was looking for! However I envision my wedges a bit chunkier--if I were to cut them down to a total of 16, would I cut 16 strips of 12" x 23.75"? Or do I need to re-calculate to allow for half as many seam allowances? THANK YOU!
ReplyDeleteWow! That is absolutely gorgeous!
ReplyDeleteHi Jessica, I have wanted to make a tree skirt like this so I want to thank you for sharing your creative talents with us.
ReplyDeleteCan I ask a clarifying question? And since no one else has asked it, I must be the only one who is missing this piece. In the tutorial, you say to sew 3 of the 4 sections together, with directions about the seam width. But at no point do you reference joining the 4th section to the skirt. I must be missing it, but thought I'd ask before I cut up fabric. thanks for patience in helping me sort this out.
Michelle
Super cute! Thanks for the tutorial for a "huge" tree skirt! We also get a huge tree every year and our skirt looks super dorky under it. This is great!
ReplyDeleteclick here to investigate I?ve learn a few just right stuff here. click here to read Definitely value bookmarking for revisiting. click now I surprise how a lot effort you put to make such a excellent informative web site. click over here
ReplyDeleteBonjour je suis le webmaster de plusieurs sites dans plusieurs domaines et avec plusieurs page rank différent jusqu'à PR 8 j'attend tous vos propositions pour échange sur mon e-mail: makremaouichaoui5@gmail.com
ReplyDeleteexemples de site:
Page rank 0 Pose de parquet
Page rank 0 Mur en parpaing
Page rank 0 Prix ravalement facade
Page rank 0 Annuaire Automatique
Page rank 0 Entreprise terrassement
Page Rank 0 margelle piscine
Page rank 0 Auditeur ISO 9001
Chemise soie
Page rank 0 Echange de lien automatique
Page rank 0 Prix toiture
Page rank 0 Renovation toiture
Page rank 1 Electricien Paris 12
Thank you for the tutorial. I have been looking a long time for a tree skirt pattern. I have linked this post on your blog to mine. http//gramsquilting.blogspot.ca
ReplyDeleteThis is a wonderful tutorial and I have linked it here:https://www.facebook.com/CostumeCon36/?hc_ref=PAGES_TIMELINE&fref=nf
ReplyDeleteMaking this for the second time. Some useful things I've learned: use a metal yardstick. So much easier than 2 rulers; cutting the wedges the suggested way wastes a ridiculous amount of fabric. Instead, we square the edge of a 26.25 long cutting, then measure the 6.5 inches on both ends, then do the 3.25 and 5/8 measurements and cut from there. Then simply measure 1.25 on the skinny end and 6.5 on the fat end. Repeat until finished.
ReplyDeleteThank you for doing all that figuring! It makes me crazy to try figure it out. Merry Christmas
ReplyDeleteLove this pattern. I made this, but cut the piece sizes down so that it finished at 48 inches(actually 48 and one half unfinished). Still came out looking great. Thank you again.
ReplyDeleteWhich kind of ruler do you use for cutting the wedges?
ReplyDeleteThere’s a pdf for the instructions but not the pattern. Am I overlooking it?
ReplyDeleteSorry
There’s a pdf for the instructions but not the pattern. Am I overlooking it?
ReplyDeleteSorry
There’s a pdf for the instructions but not the pattern. Am I overlooking it?
ReplyDeleteSorry
I am excited to try this, but I cannot get the pdf pattern to load! Is there anything I am missing? Can someone help me! LOL
ReplyDeletenice post Private tutor St. Augustine
ReplyDeleteDoes anyone have the PDF pattern they could send me? When I click on it to download, it says it is not there.
ReplyDelete